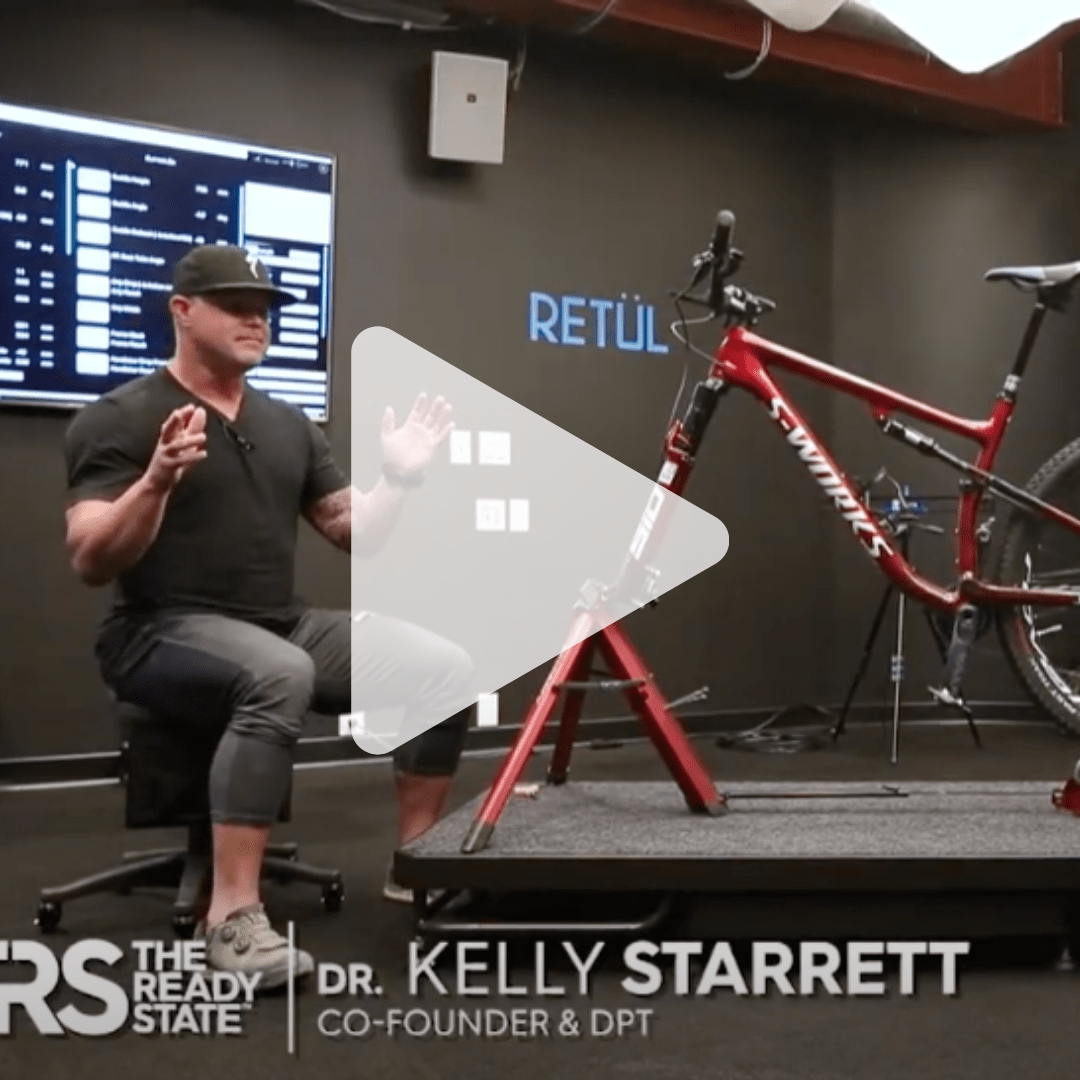
SoS Uses Retül Technology for Your Best Fit


“Don’t believe everything you read on the Internet.” – Abraham Lincoln
If you didn’t just chuckle out loud, read that first line again. It’s so easy to trust the quotes, articles, and images that are served up to us online, including those about sport! As we scroll through our social media apps and click through our emails, you might see something and think, “Is that for real?”
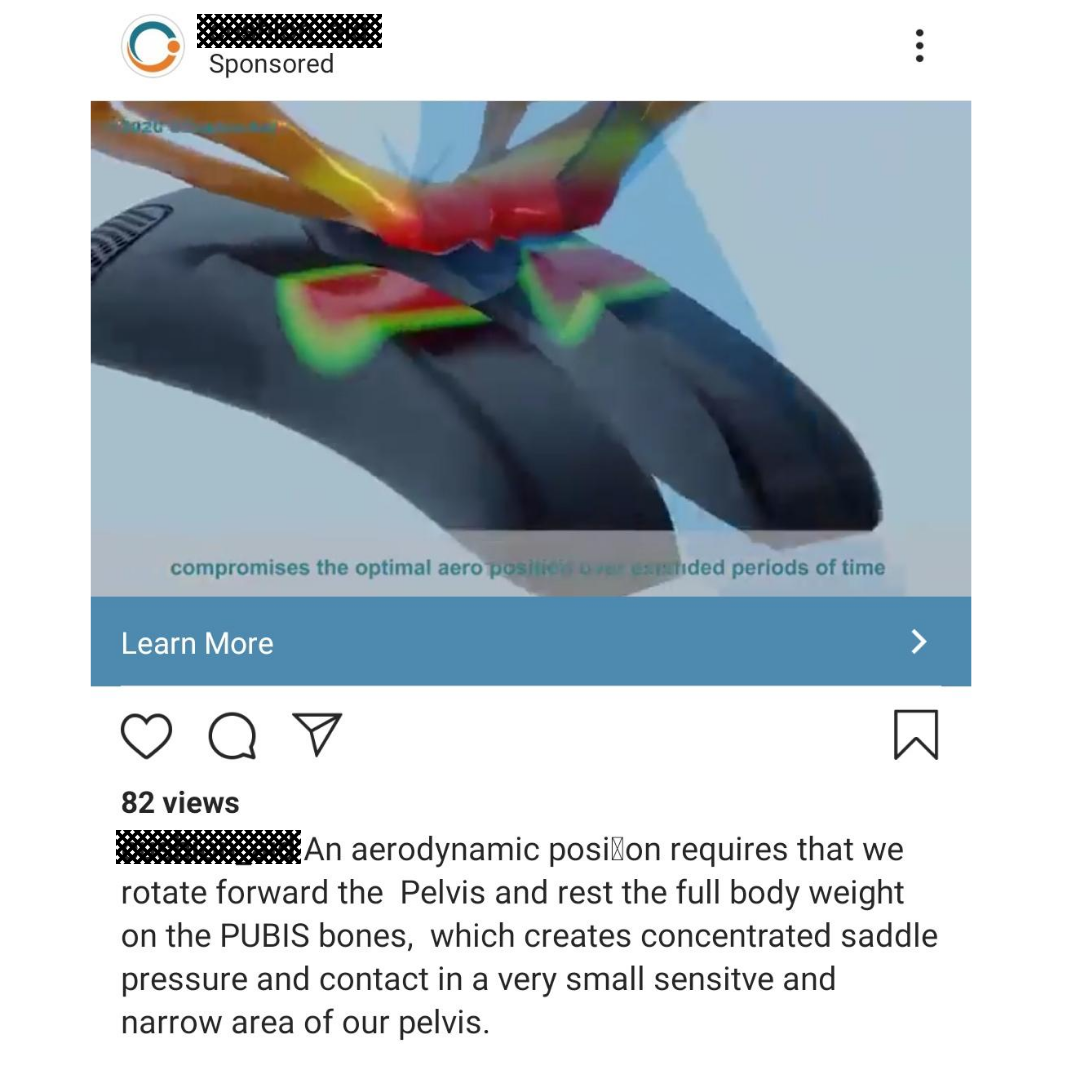
You’re not alone! Coach Brady spotted this social media ad last week and it made him say, “Huh?”
He sat down to fact check this social media ad. Here’s his feedback:
“In the image and the description, the company states that pressure is put on the ‘pubis bone’ due to the necessary rotation of the pelvis for an aero/triathlon position.
It is true that we do have to rotate our pelvis forward in the aero position. It is also true that certain saddles and a bike fit that includes that saddle can help you avoid discomfort.
What’s misleading here is the idea that your rotation would be extreme enough that your weight and pressure is supported by the pubic symphysis (pubic bone.) That would result in a contact point in front of your genitals. This would not only be uncomfortable but very awkward from a positional standpoint. Ouch!
The change that actually occurs when we move to this position is from our ischial tuberosity on to the inferior rami of the ischium.”
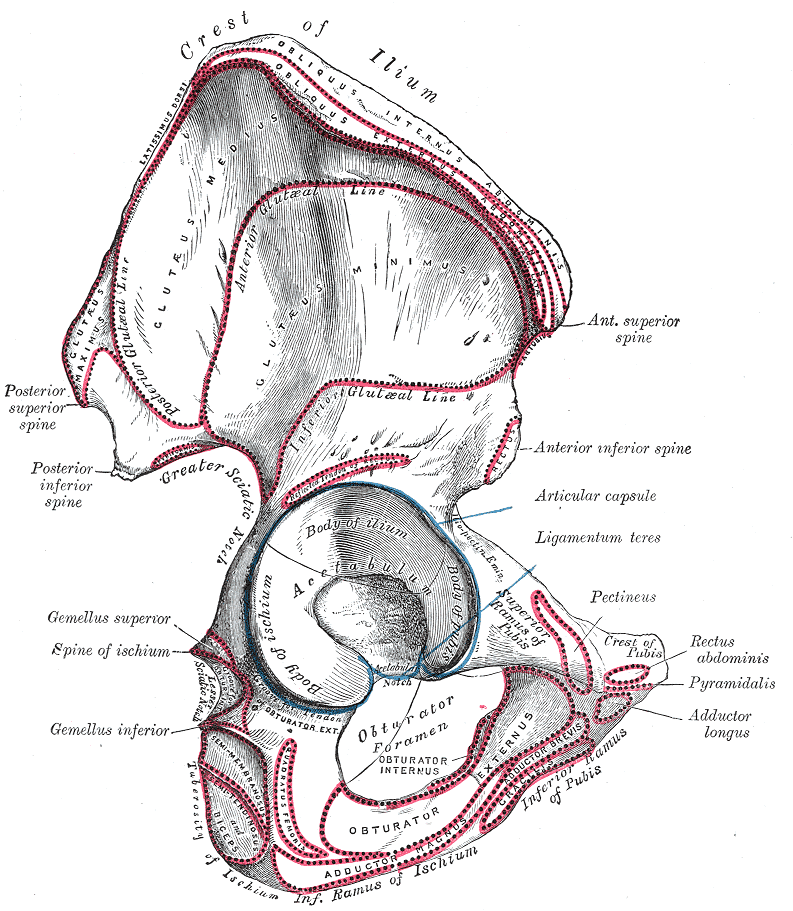
Drawing By Henry Vandyke Carter – Henry Gray (1918) Anatomy of the Human Body (See “Book” section below)Bartleby.com: Gray’s Anatomy, Plate 235, Public Domain, https://commons.wikimedia.org/…
If you ever have a question about training advice, technical specs, or the athlete’s body you see online, your Science of Speed coaches are here to confirm or debunk! Science is the first word in our brand name and we take that very seriously. It’s why our team is comprised of people with the highest level of education, experience, and expertise. We looking forward to hearing from you soon!
Too often, we hear stories of athletes who have been dealing with debilitating pain, recurring injuries, or other symptoms that sound more like they are riding a medieval torture device than a bicycle.
Our goal at Science of Speed (and Bike Fit Box) is to provide athletes with the training, fits, and testing they need to enjoy a lifetime of cycling. Here are five signs that it’s time to see how a bike fit can be beneficial to your cycling longevity:
Joint Pain
Cycling is a minimal weight-bearing form of exercise and any joint pain should be immediately assessed. If you’re feeling discomfort in your joints during and after your ride, it’s time to schedule a fit.
Saddle Pain
Saddle sores, excessive soft tissue pressure, and numbness are all factors that are indicative of an improper fitting. These symptoms quite often immediately lead to the assumption that the incorrect saddle has been picked. This however is not always correct and saddle comfort can be improved by bicycle fit!
Numbness
When you hear the two words “cycling” and “numbness” in the same sentence, what comes to mind? More than likely, you thought of groin numbness. That can be a terrible sensation, and it is a concerning one. Numbness can arise is the hands and feet as well. No matter where you may experience numbness, it is indicative of nerve trauma and should be resolved as quickly as possible. A bike fit can help you avoid irreparable damage.
Tendonitis
Cycling is a repetitive sport that occurs predominantly in one plane of motion. At 90 RPM, you are asking your body to repeat the same motion 5,400 times in an hour of cycling. That repetitive movement is asking a lot of muscles, ligaments, and tendons. If your bicycle fit is not correct, you are placing the tendons, which connect your muscles to your bones and provide the needed leverage to pedal, under greater strain than necessary.
Cycling Economy
The body is a series of levers and hinges. In order to make them function effectively and efficiently, each of those hinges needs to perform in optimal ranges. A fit is the optimization of these movements to improve your efficiency. It is an amazing sensation when your bike fit is perfected. You can’t beat the feel of the wind in your face and the smoothness in your pedal stroke as you glide with less effort!
Ready to schedule your bike fit? If you’re in the North Florida area and desire an in-person professional fitting, visit this page to book your appointment now. If you desire an at-home fitting anywhere in the US, try Bike Fit Box!

The early season, for many athletes, is a time to build aerobic capacity, improve inefficiencies or fine tune form. One, very common method of improvement that cyclists and triathletes use is fast pedal drills. I am certain the vast majority of you reading right now are, not only familiar with these drills, but have more than likely done them yourself.

Fast pedals often consist of very high cadence, 120+rpm pedaling, for 30-120 seconds. In these drills it is usually recommended that athletes pedal up to a cadence where they begin to bounce in the saddle and then slightly lower pedaling cadence down until bouncing stops.
“Why do this?” you may ask. The most common goal is to help athletes increase average cadence and smooth out the biomechanics of the pedal stroke.
Getting nerdy:
Ultimately the factor in improving pedaling biomechanics is to improve neuromuscular efficiency. This increase in efficiency is caused by an improved synchronization of motor unit firing (think muscles working in unison) and an improved ability to recruit motor units (think force production). In the end this leads to more efficient muscular contractions and more forceful contractions when needed.
With this goal in mind, I believe that it may be time you rethink your fast pedal approach. Instead of what you have done previously I recommend you try high cadence pedaling intervals. Where cadence is a factor as well as load. These intervals would be as follows:
5×6 minutes @ 88-90% of FTP
10RPM above your “comfortable” cadence
To properly train the body we are looking at not only the neuromuscular level but the entire system must be working in unison. My concern for many is that as cadence increases to the extremes biomechanics deteriorates and therefore muscle recruitment is not optimal.. If we go back to the old Vince Lombardi quote that “Practice does not make perfect, but perfect practice makes perfect” then fast pedals may be going about it all wrong.

Cycling is a sport that is founded on camaraderie and social atmosphere. It usually begins with a friend or family member, who has a passion for the sport, decides to share the joy that riding a bike can bring and it quickly grows to a larger passion for many. Quickly filled with group rides, cycling events and coffee/donut rides.
For some, this passion turns into a desire to push physiological limits and once believed physical peaks. If you fall into this category we suggest you assess your rides and determine if all of your rides end up as group rides or if you have one or two weekly structured rides.
Several weeks ago a group of athletes set out to perform intervals together. What came from this workout proved to be a great example of how training with others can be of detriment to your ride. The workout was quite simple, it was four threshold intervals, each eight minutes in length with four minutes of active rest between intervals (ignore that 4th interval, the cold temps increased desire for coffee). During these intervals two of the athletes stayed together, averaging a faster pace where the 3rd rider rode the intervals solo. Rider’s 1 and 2 covered, on average, more ground than rider one and both felt that perceived exertion was an 8/10 intensity. Where as our 3rd rider rode slower but also stated his perceived effort was the same 8/10. The ride results in the following power profiles:

One detail to keep in mind is that, although weights vary between these riders by approximately 10lbs from the heaviest to the lightest, their power at threshold is the same which means that interval ranges are also the same.
From the data you can see that rider 1 & 2 both had a more stochastic power profile for their intervals whereas rider 3 had a more plateaued effort throughout each interval. Rider 3 also had significantly higher average powers that fell within the goal range. Riders 1 & 2, on the other hand, spent less than 60% of their intervals in their power ranges and averages fall well below the prescribed goal.
This may not seem like that much of an issue, but if you are working with 3-8 hours a week to train and your workouts look like this you are not only focusing on a completely different effort and potentially different energy system, you are decreasing your potential results because the overload/stress that has been created is less than desired.
Buck the trend and be the lone wolf if you have intervals scheduled. You can either take your turn on the front, or drift off the back to get the work done that you need to accomplish, but don’t do like riders 1 & 2 did in this circumstance and negatively impact the goal in mind.

When executed perfectly a paceline is not only a thing of beauty but a system of efficiency. Creating added speed when compared to any single rider and potentially less energy exertion. In group riding 101 and 201 we covered many of the key elements that make up the basic paceline and allow it to be fast and efficient.
In this article we are going to take it up another level in complexity as well as touch on one key adjustment made to the rotating paceline in a race situation.
The Kick Back
First thing is first. So, let’s touch on a key area that sounds so simple but can, and does, lead to many close calls and accidents in the group. Standing up! Yep, the simple act of getting out of the saddle, if improperly executed, in close quarters can lead to a pile of mangled bikes and bodies. When you stand up your body accelerates forward and the bicycle moves back up to a foot. Alone this is not a problem, but with another cyclists one to two inches off of your back wheel it is another story. Overcoming this is simple though. To help reduce the amount of kick back you have simply shift 1-2 gears hard and as you stand you will press down on the pedal. This will help to accelerate the bicycle forward with your effort. “What else?” you ask. That is it. If you execute this properly, your bicycle will barely go backwards and may even accelerate a bit. If you watch the pro peloton you will occasionally catch another action to make the rider behind you aware. It is a double elbow flick. Flick both elbows at the same time, give it a few pedal strokes and then stand. That alerts the rider behind you that you are standing and gives them a moment to give you a bit of space.
The Echelon

An echelon is a fancy word for an angled rotating paceline. Echelons are used when there is a cross wind and riders are trying to seek shelter from the wind, and more importantly the added work. In an echelon the front lane is the “fast lane” and the back row is the “slow lane.” the rider furthest to the front is taking most of the burden in the wind and the riders at the back have the greatest amount of shelter. This works nearly identical to a rotating paceline but caution must be used due to the high likelihood of wheel overlap. *This is best used in race settings where there is vehicle support and protection from traffic because it can take the entire width of the road.
Double Pacelines

These pacelines are great on more social rides where traffic is light to non existent. The double paceline allows riders to be 2 abreast and talk to one another, but still provide draft for riders behind them. Once a rider is done “pulling” on the front of the group they peel off to the outside of their lane and drift back. Pulls on the front are typically longer 3-10 minutes and near tempo effort. Personally we like this best on long training rides, however it is important to be aware of your surroundings and attentive to traffic. When rotating to the back you not make the group four riders wide and on busy roads this is not a good option.
All of these approaches in group rides have their own place and their own purpose. The biggest thing to remember is that the safety of the group is priority number one and that communication is the best way to keep you and your group safe. If something unsafe is occuring, do not be afraid to bring this up to the individual or the group and try to resolve the issue.

In our article “Group Riding 101,” we detailed the key basics of riding in a group. In this article, we will go into the most common group riding pacelines, the single paceline and rotating paceline, and how to properly work your way around a paceline.

Single Paceline
The single paceline consists of an acceleration (“fast lane”) and deceleration (“slow lane”). This is a very commonly used paceline because it is fairly easy to navigate, takes up minimal space and can be modified to the needs of the group very easily.
Rotating Paceline
The only variation from the single paceline is that there is a constant line of riders in the deceleration lane and the acceleration lane rotating fluidly from one to the other. “Pulls” on the front are usually very short with the rider in the acceleration lane passing the rider’s front wheel in the deceleration lane and then they drift into the
deceleration lane waiting for the next person to pass them. This is the beautiful paceline that you often see in breakaways of large races where riders are constantly moving up to the front and then rotating to the back.
Pulling Off
Getting off the front of the group is something that is a highly desired end. Legs are burning, lungs are screaming, the heart is pumping at capacity and the desire to end the effort is nothing short of coveted. Before jerking the bars to the left, you must consider the position of any riders in the direction of your planned direction (cars too). As you are passing the rider, you should wait to begin drifting over until your hips have passed the hoods of the rider that you are overtaking. Once you begin pulling off, you will signal the rider behind you that you are wanting him/her to take your position with a flick of the elbow. When pulling off, you are trying to leave just enough room for the rider to be able to pull past you, ultimately keeping the group tight knit and more aerodynamic. Pulling off to the center line not only decreases the efficiency of the group by decreasing the draft of the rider behind you. It endangers you by putting you in the path of potentially passing vehicles.
Getting Back On

The hardest part of the paceline, for many, is getting back into the paceline. The number one mistake that cyclists make is to wait too long to accelerate to try and get back onto the paceline. If your group is consistent in rotating through, you can continue to look for the same rider at your shoulder as a marker but you will often have to sight back to find the last person. Once the last person is found, you will wait until your front skewer is even with the other rider’s rear skewer. At that point you will want to provide two to three powerful pedal strokes and drift in behind the rear wheel of the last rider.
Ready to keep improving your group riding knowledge? You’ve graduated from 201 and are ready for the next level: Group Riding 301.


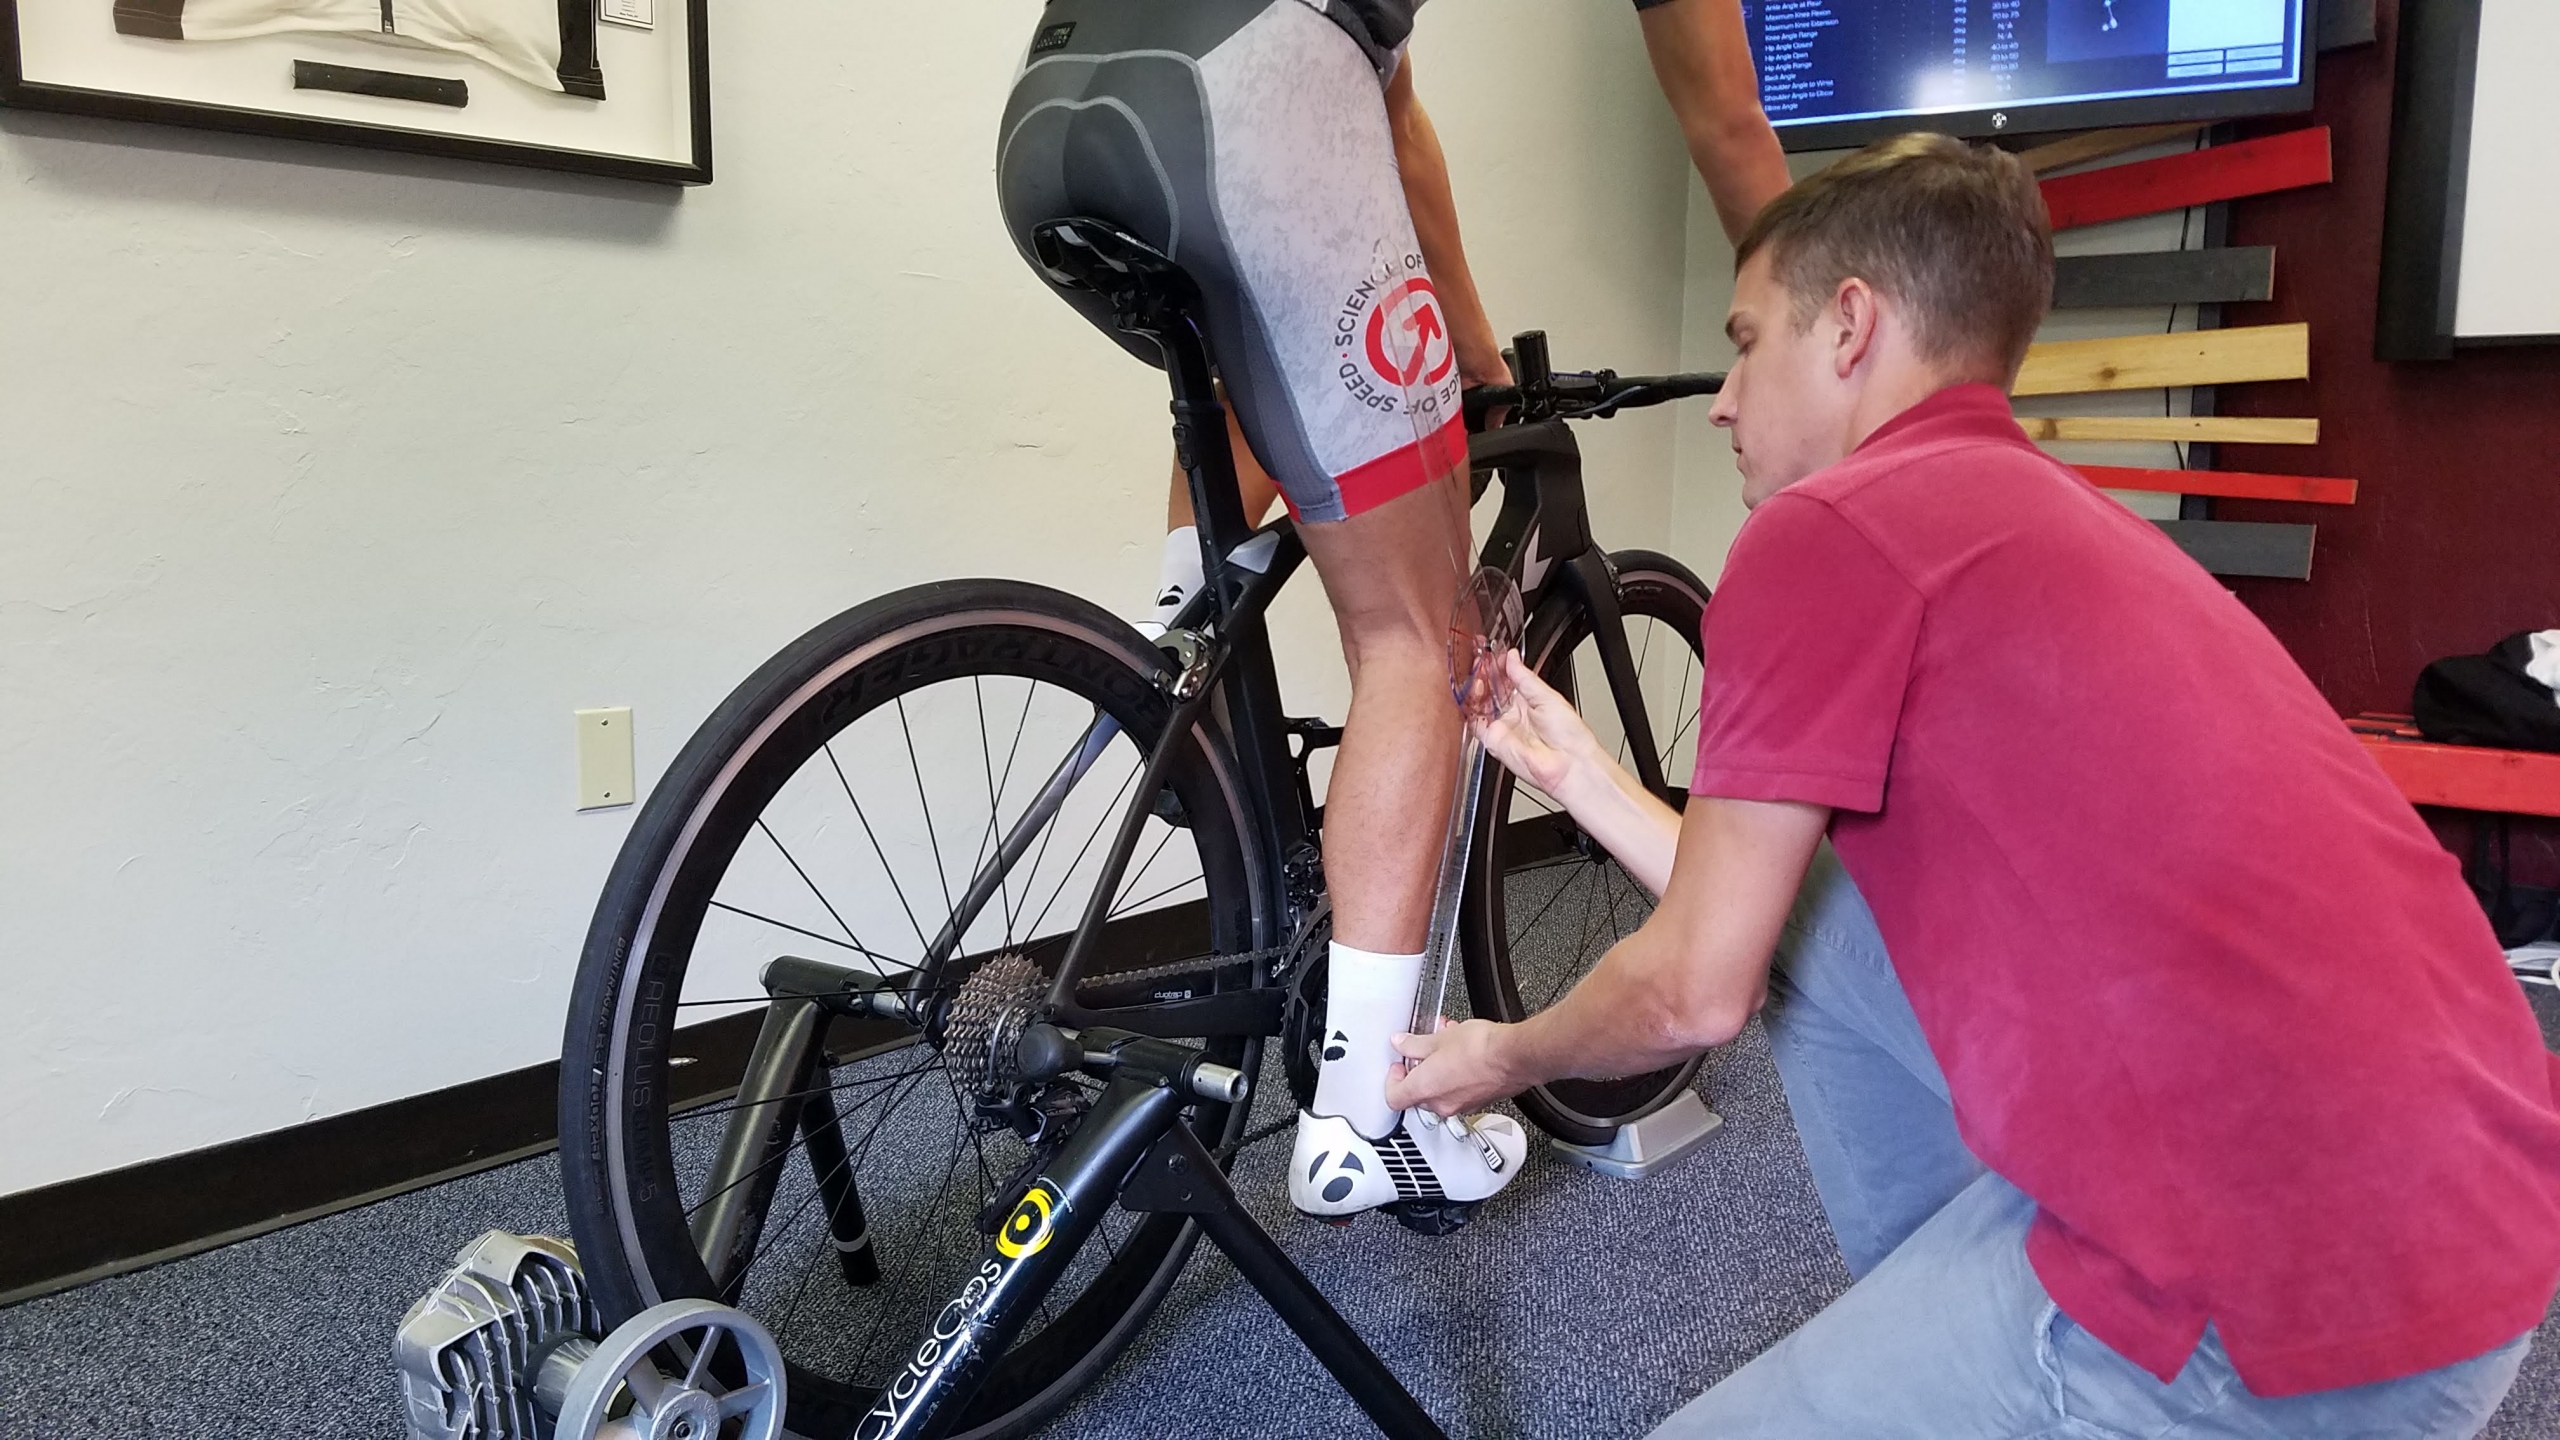
There are several fit methods that exist where either inseam length or leg length is the measurement that is used to determine seat height based off an equation. Where as this is an option that could help you determine a reasonable seat height we do not feel it is an optimal, or even a viable option for finding your seat height.
When initially hearing the thought behind these methods they make sense. Your leg extension is the primary factor in the equation of saddle height and based on a fraction of this you could feasibly create an accurate saddle height.
Upon greater inspection and comparison with motion capture, of how individuals interact with a bicycle it has become evident that there are many factors not able to be considered when solely using inseam length/leg length. These factors include the three key angles (ankle, knee & hip) that vary from one cyclist to the next, how you determine where you sit on the saddle as well as pelvic rotation. With these factors, and a firm understanding of bicycle fit, we find it very difficult to believe that one simple measurement could take all of these factors into consideration.
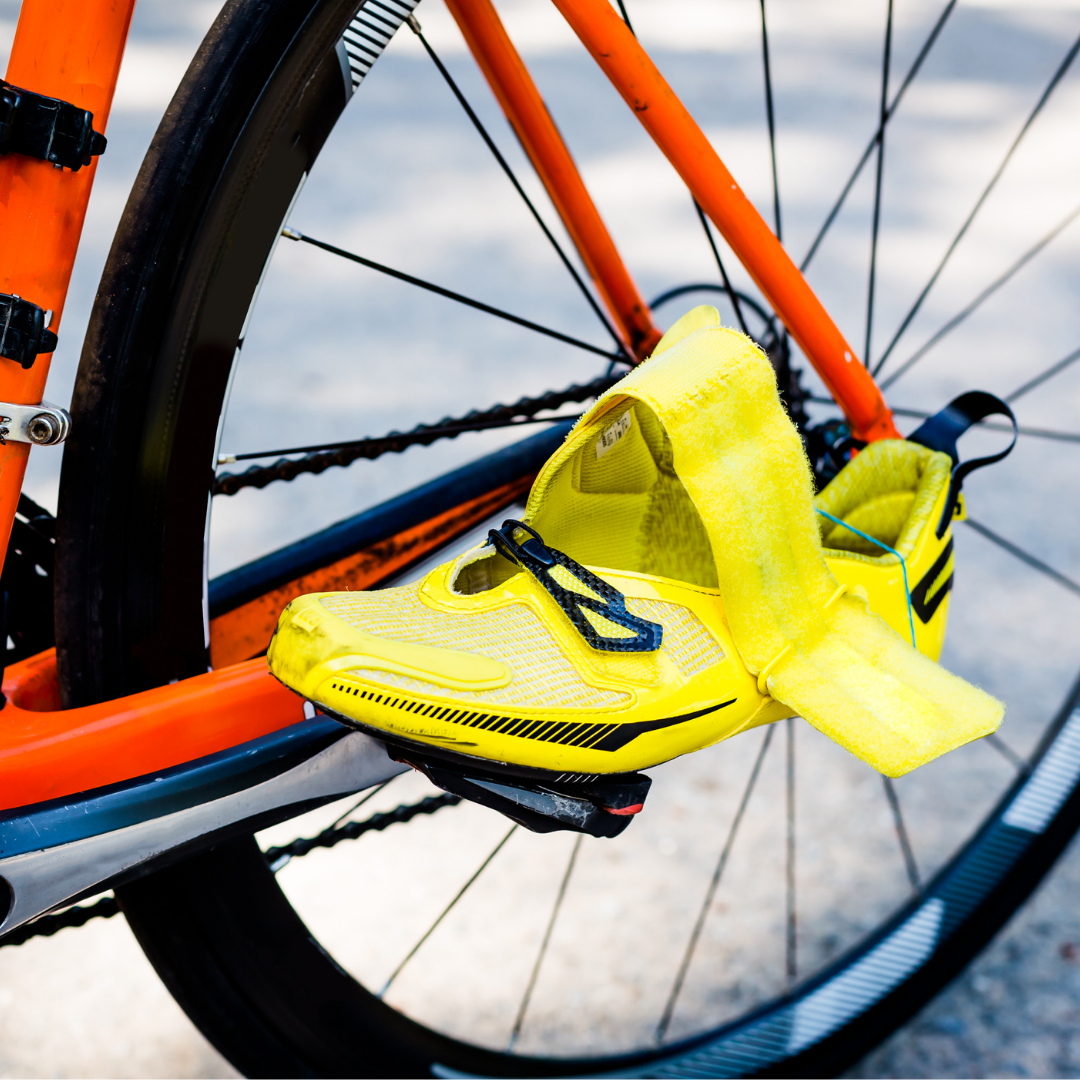
In a recent article posted by Triathlon.com there was discussion of a mid-sole cycling cleat placement in cycling shoes. This mid foot cleat placement is nothing new to the cycling world. It has been an idea for decades now and has resurfaced many times as the latest and greatest thing for bicycling performance. It seems strange to think about having a cleat in the middle of your foot, mostly because fore foot cleat placement has been the only thing many cyclists have ever witnessed.
The article sings the praises of mid-foot cleat placement, and there are benefits, but there are also a few key details that are a detriment. We are going to break this down into several key areas include Fit and Function.
BIKE FIT
At Science of Speed, we live and breathe bike fit, so we will begin there! Mid cleat placement does have merit when it comes to bike fit. The calf muscles do not provide much benefit, regarding propulsion on the bike but act more as a stabilizer for the ankle. We will even place cleats further back on shoes of riders with larger feet to help reduce the lever arm, and ultimately reduce calf strain. With a mid-foot cleat placement you will reduce this more significantly and only moderately utilize the calf for stabilization which should ultimately result in fresher calves for run propulsion.
This mid-foot cleat placement will also result in a lower seat height. As you reduce the impact that “ankling” plays on total leg extension. This, with changes made in cockpit setup will result in a smaller frontal area and mean a slightly more aerodynamic position. Which, in a world of marginal gains, this could result in sizable increases in aerodynamics.
As we have not personally tried this mid-foot cleat placement, the one thing we are uncertain of is, how does it fit, feel and function as a rider is out of the saddle climbing? This may be a position that is more suited for a flat, straight and fast course. If there is that big of a benefit, we believe that professional cycling teams who focus on the small areas, such as Ineos, would have shoes for riders with mid-foot placement for time trials, and forefoot placement for climbs and technical courses where safety would be a concern.
FUNCTION
Unfortunately, in this article, normalized power is misrepresented. This is not so much a representation of “efficiency” with reference to the benefit of your position, but a representation of a rider’s smoothness on the ride. Normalized power is an algorithm that is designed to quantify the stress that accelerations create on the body and therefore shows a higher number if a file has more accelerations. With course, conditions and fitness all being the same, average power would be a better representation of whether the cleat placement did result in statistically significant power outputs.
It pains me to see that the shoe manufactures are demonized in this situation. This lack of adoption of mid sole could be because it has the potential to be very dangerous. If you have ever heard of toe overlap you understand why mid-foot cleat placement can be, not only a scary thing, but a dangerous thing. This toe overlap impacts your ability to pedal through corners and not clip your front wheel with your shoes. With current bicycle geometries, fore foot cleat placement this is a small issue, but by sliding your foot forward on the pedal you are now putting the ball of your foot into the front wheel when your pedal is in it’s forward most position and turning what was once a small problem, into a major safety concern.
Lastly, in regard to functionality we have to touch on the triathlon specific area that may not have been considered. Transition. If you run through transition with your cycling shoes you have either personally fallen or witnessed someone else fall because of how slick cycling cleats are. Now you are going to be either, skating on the cleats, or feel like you are trying to walk on stilts as you are perched upon your Look, Shimano, or even scarier, Speed Play cleats.
As you weigh the advantages and disadvantages of a mid-foot cleat placement and make your decisions, please keep in mind three key factors of entry. First and foremost is the price. Just like anything, being an early adopter of a product, theory or technology, you will pay more. In this case the “more” could be upwards of $1500 in some circumstances. You can also expect there to be a bit of a learning curve (no pun intended) when it comes to cornering as you learn what your new limitations are. Last, but not least, assess the potential benefits of this cleat placement and will it compensate for you factors that could arise in transition. If you are not racing for the win, running the entire run leg or comfortable and confident handling a bike, it may not be the best option for you.